GitLab
Connect your GitLab repositories to Gitar
GitLab repositories can be connected to Gitar using two methods: OAuth authentication or manual setup with personal access tokens via service accounts.
Connection Methods
OAuth
Quick and secure one-click connection through our secure API endpoint.
- →Automatic authorization flow
- →Seamless repository access
- →No manual token management
Manual (Service Account User)
Advanced configuration for custom GitLab instances and specific access control.
- →Custom GitLab hostnames
- →Specific group/namespace targeting
- →Project-level access control
Setup Instructions
The OAuth method provides the simplest setup experience. When you click Connect GitLab, you'll be:
- Redirected through our secure API endpoint
- Taken to GitLab for authorization
- Brought back to complete the integration
- Automatically set up with your repositories

For custom GitLab instances or when you need more control over the connection, use manual setup. First, create a service account and generate a Service Account Personal Access Token. Ensure that the name of the service account is "Gitar Service".
Create a dedicated service account for Gitar integration to maintain security and isolation:

- Go to your GitLab instance admin area
- Create a new service account with name "Gitar Service"
- Grant appropriate permissions to repositories
Generate a Personal Access Token with the required scopes for the service account:

- Log in as the service account
- Go to User Settings → Access Tokens
- Click "Add New Token"
- Enter token name and set expiration
Select the following scopes for Gitar integration:

Required scopes:
read_user- Required for user authentication and OAuth integration with Gitarread_repository- Allows Gitar to read repository contents, branches, and metadataread_api- Enables reading GitLab API data for project information and settingswrite_repository- Required for creating pull requests and pushing code changesapi- Enables automatic webhook setup and project discovery
Click "Create personal access token" to generate the token. Save the generated token securely - you won't be able to see it again.
Before configuring the connection, you must add the service account as a member to each project that you want to enable with Gitar. The service account requires Maintainer role or higher.
- Navigate to your GitLab project
- Go to Settings → Members
- Click "Invite members"
- Search for your service account user
- Assign Maintainer role or higher
You must add the service account to each project individually that you want to enable with Gitar. Projects where the service account is not a member will not be available for selection.
Use the generated token to configure the connection with the following fields:

- GitLab Host: The hostname of your GitLab instance (e.g., gitlab.com, gitlab.example.com)
- Group/Namespace Path: The group or namespace path (e.g., "gitarcode" for gitlab.com/gitarcode)
- Project ID (Optional): Find your project ID in GitLab project settings
- Personal Access Token: Token needs all the scopes listed above
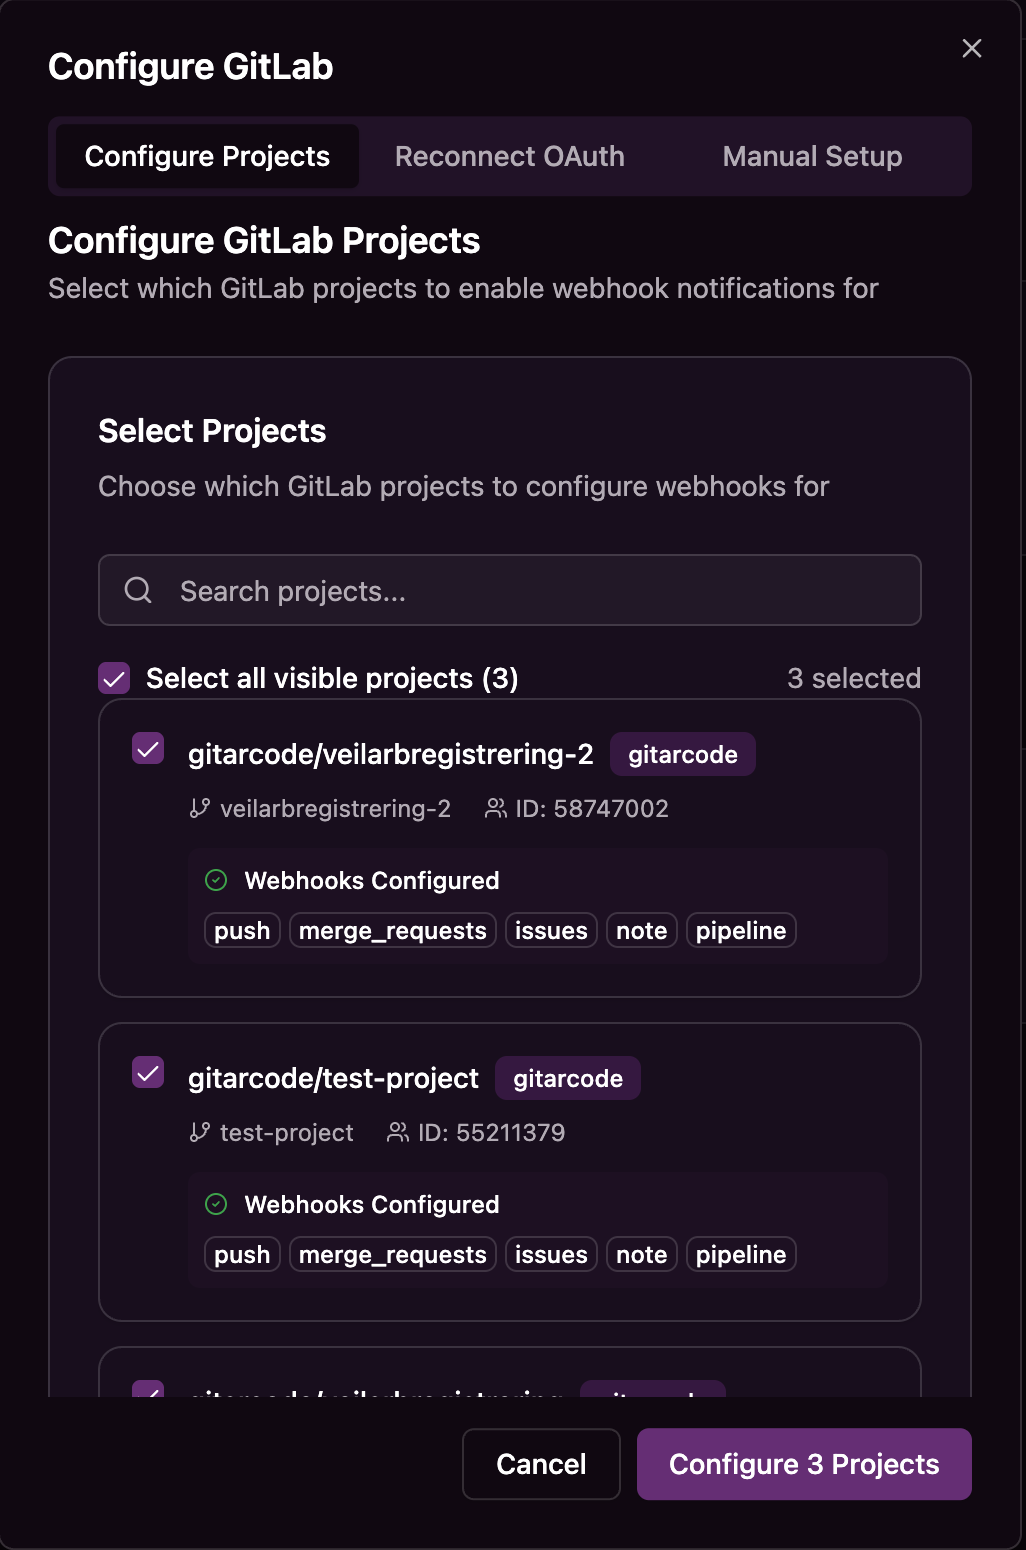
Configure Repository Access
After connecting GitLab, you can configure which repositories should receive Gitar webhook notifications.
Repository Configuration
Click the Configure button for GitLab to select which repositories you want to enable for webhook notifications.