GitLab
Connect your GitLab repositories to Gitar
GitLab repositories can be connected to Gitar using a service account with personal access tokens.
Setup Instructions
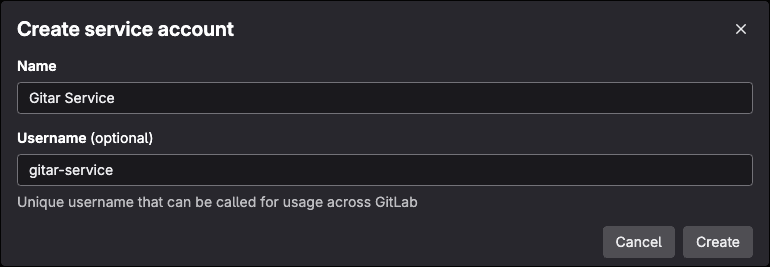
Create a service account and generate a Service Account Personal Access Token. Service account names must be globally unique in GitLab, so use a naming convention like gitar-service-<org-name> (e.g., gitar-service-acme).
Create a dedicated service account for Gitar integration to maintain security and isolation:
Service Account Requirements
Create the service account at the top level (instance-level), not within a specific group. A top-level service account avoids permission issues when listing projects and prevents duplicate webhooks if you later add more groups. Service account names must be globally unique in GitLab, so use a naming convention like gitar-service-<org-name> (e.g., gitar-service-acme).
- Go to your GitLab instance admin area
- Create a new service account (e.g.,
gitar-service-acme) - Grant appropriate permissions to repositories
Generate a Personal Access Token with the required scopes for the service account:
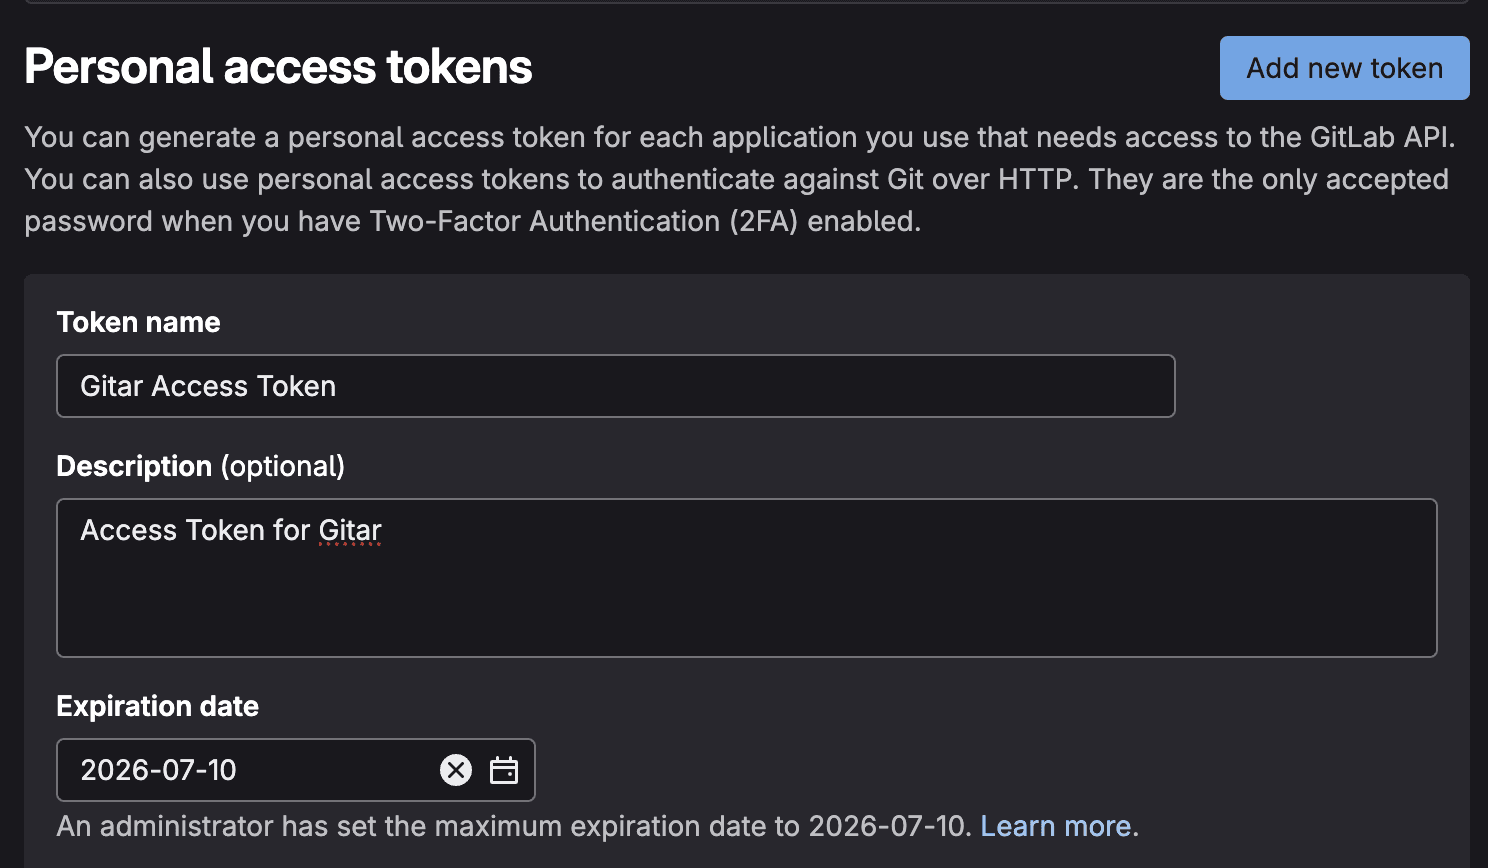
- From the service account page where you created the account, navigate to the access tokens section
- Click "Add New Token"
- Enter token name and set expiration
Select the following scopes for Gitar integration:
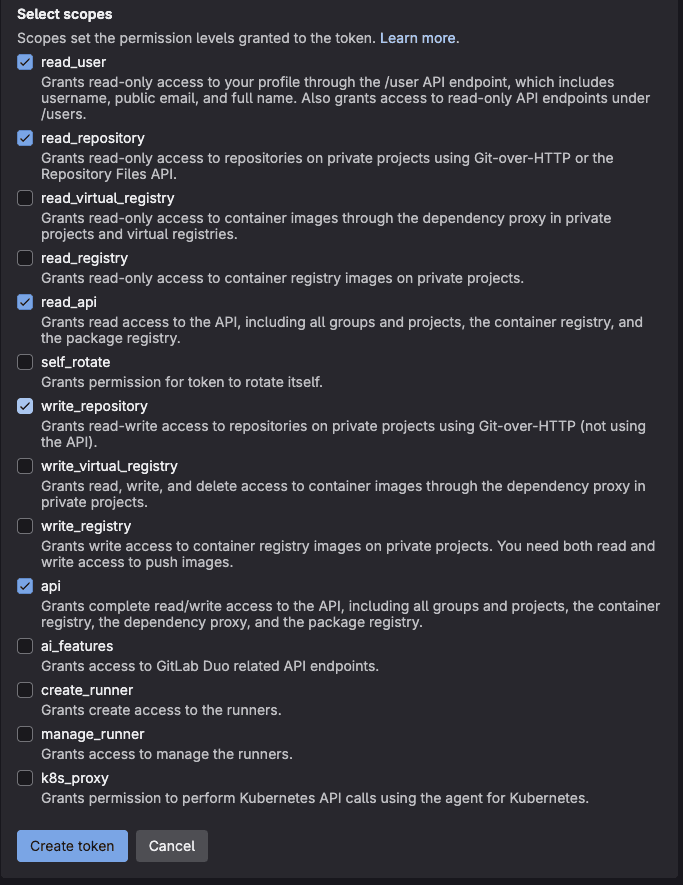
Required scopes:
read_user- Required for user authentication and integration with Gitarread_repository- Allows Gitar to read repository contents, branches, and metadataread_api- Enables reading GitLab API data for project information and settingswrite_repository- Required for creating pull requests and pushing code changesapi- Enables automatic webhook setup and project discovery
Click "Create personal access token" to generate the token. Save the generated token securely - you won't be able to see it again.
Before configuring the connection, you must add the service account as a member to each project that you want to enable with Gitar. The service account requires Maintainer role or higher.
- Navigate to your GitLab project
- Go to Settings → Members
- Click "Invite members"
- Search for your service account user
- Assign Maintainer role or higher
You must add the service account to each project individually that you want to enable with Gitar. Projects where the service account is not a member will not be available for selection.
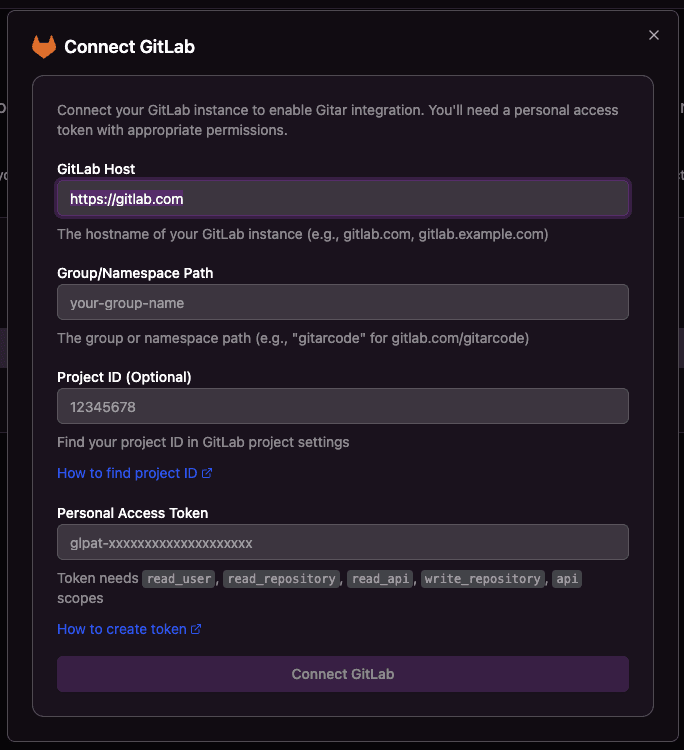
Use the generated token to configure the connection with the following fields:
Changing Configuration After Setup
You can update the group, token, or other connection settings after onboarding by going to Settings → Configuration in your Gitar dashboard.
- GitLab Host: The hostname of your GitLab instance (e.g., gitlab.com, gitlab.example.com)
- Group/Namespace Path: The group or namespace path (e.g., "gitarcode" for gitlab.com/gitarcode)
- Project ID (Optional): Find your project ID in GitLab project settings
- Personal Access Token: Token needs all the scopes listed above
Configure Repository Access
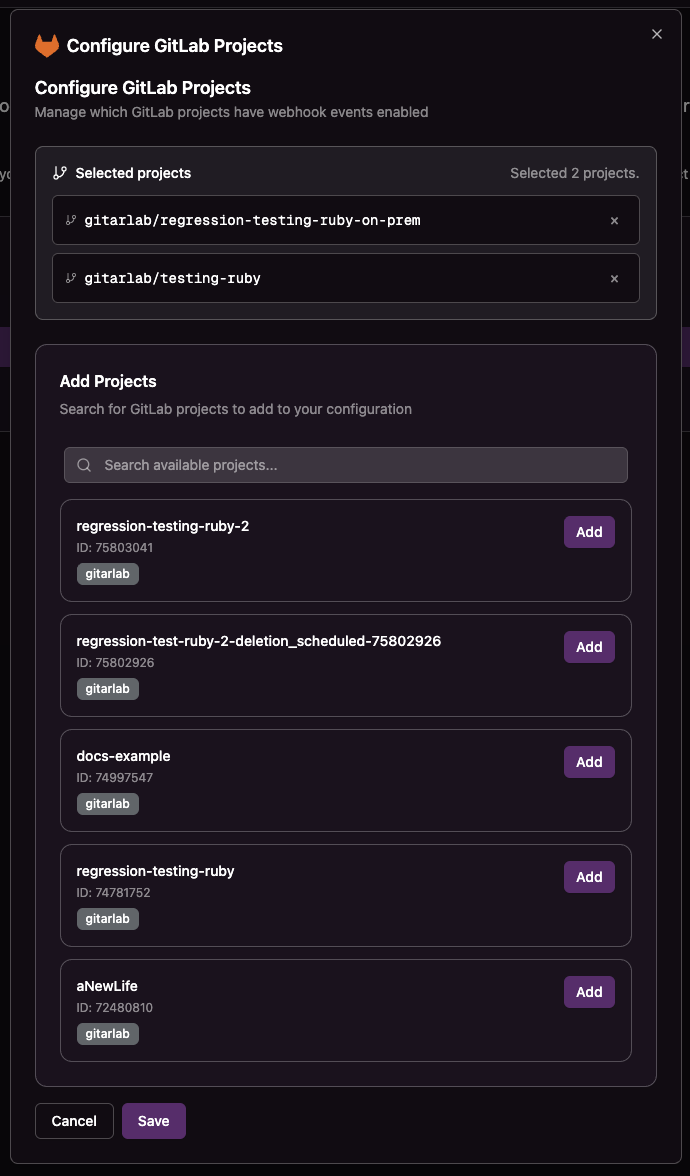
After connecting GitLab, you can configure which repositories should receive Gitar webhook notifications.
Repository Configuration
Click the Configure button for GitLab to select which repositories you want to enable for webhook notifications.
Self-Hosted GitLab: Git Hooks Configuration
If your self-hosted GitLab instance uses server-side git hooks to validate committer emails (push rules or custom hooks), you must allow Gitar's committer email address.
Gitar uses noreply@gitar.ai as the committer email when pushing changes (e.g., fix requests, automated commits). If this email is not allowed, Gitar will be unable to push changes and operations will fail.
Adding the Gitar Committer Email
Depending on your GitLab configuration, add noreply@gitar.ai to your allowed committer list:
Option 1: GitLab Push Rules (Recommended)
- Go to Admin Area → Push Rules (for instance-wide rules) or Project Settings → Repository → Push Rules (for project-specific rules)
- In the "Commit author's email" field, add a regex pattern that includes Gitar's email:
@yourcompany\.com$|^noreply@gitar\.ai$ - Save the push rules
Option 2: Custom Server-Side Hooks
If you use custom pre-receive or update hooks that validate committer emails, add noreply@gitar.ai to your allowed email list in the hook script.
Option 3: Service Account Email Configuration
Alternatively, ensure the Gitar service account in GitLab has noreply@gitar.ai configured as one of its verified emails.
Firewall / IP Allowlisting
If your self-hosted GitLab instance is behind a firewall or IP allowlist, you must permit inbound traffic from Gitar's public IP addresses. These are the external-facing NAT Gateway IPs that Gitar uses for all outbound requests (e.g., cloning repos, pushing changes, calling the GitLab API):
35.174.95.3
35.169.30.69
54.225.114.110
Add all three IP addresses to your firewall rules or GitLab instance's network allowlist to ensure uninterrupted connectivity.